Introduction
A software factory is a small team of AI coding agents where each agent has one job and hands its work to the next, until a result exists that someone other than the author has checked. BAND Desktop is where that team lives: you create each agent in the app, point it at a folder, and talk to all of them in one shared room.
Most multi-agent write-ups start with code. Install an SDK, register three agents, keep three terminals open. This one starts with none of that. There is no SDK and no process of yours to keep alive. Everything in this build happens inside BAND Desktop and one project folder.
The failure this tutorial is designed around is an old one. In a team of agents, as in a team of people, nobody owns the check. The Engineer says the work is done, the Planner believes it, and the demo breaks. So the factory below has a Reviewer seat that does not take the Engineer's word for anything. It re-runs the tests itself, reads the files, and is allowed to answer BLOCKED.
What you'll build:
- A three-seat factory in one BAND room: a Planner and an Engineer on Claude Code, and a Reviewer on OpenCode
- A spec with numbered acceptance criteria, so the Reviewer can say exactly which one lacks evidence
- Three mandate files and a single kickoff message that tell the agents how to hand work to each other
- A working Focus Board, a kanban web app with a work-in-progress limit, written entirely by the agents and verified by the Reviewer
Three things came up while building this that are easy to miss. A template's role text and a role file you upload are not additive, and mixing them up quietly changes how an agent behaves in the room. The working directory field decides whether your three agents share a project or each invent their own. And the Planner closed two gaps in the spec before any code existed, which is the cheapest place to find a spec problem. Each one is covered in the step where it matters.
This is especially useful for AI hackathons, where you have days rather than weeks and need a repeatable way to get a team of agents to produce checked work. The WeAreDevelopers x BAND Dark Factory hackathon asks for exactly this shape: a factory of coding-agent seats in BAND Desktop, with the mandates and the room itself as part of the submission. If you want an event to apply it in, browse lablab.ai's global AI hackathons.
The finished project is on GitHub at vicdevman/factory-demo. Every code block below links to its exact source.
See it running first
Clone the finished project and check it before building anything:
git clone https://github.com/vicdevman/factory-demo.git
cd factory-demo
node --test
You need Node 18 or newer, and nothing else. The suite should finish like this:
# tests 28
# suites 0
# pass 28
# fail 0
Then open index.html in your browser. Add a few cards, move four into Doing, and the board refuses the fourth with a message on the page.
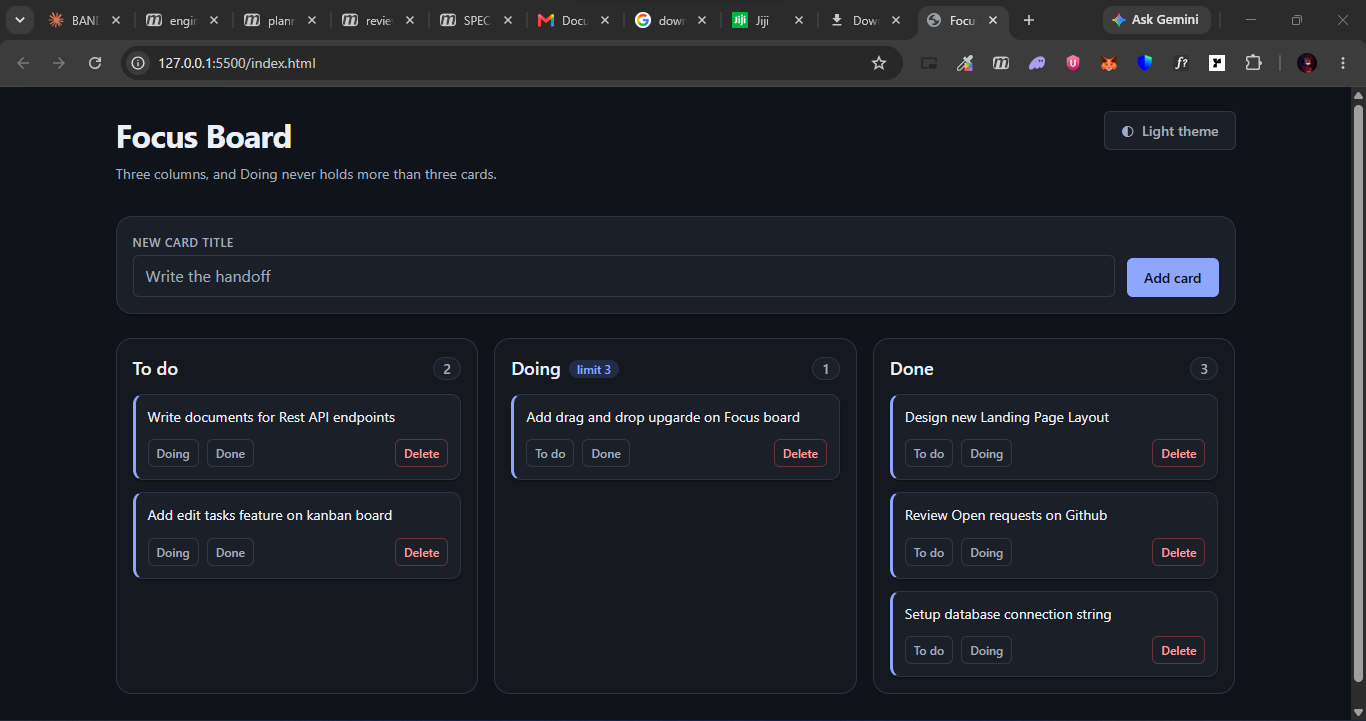
Everything in that folder except SPEC.md and prompts/ was written by the three agents. The rest of this tutorial shows how to set that factory up from scratch.
Prerequisites
- BAND Desktop installed and signed in to your BAND account
- Claude Code installed and signed in, for the Planner and Engineer seats
- OpenCode installed and configured with a model provider, for the Reviewer seat
- Node.js 18+, only to run the tests
- Git and a code editor
Everything here was built on Windows, so paths in the screenshots look like C:\Users\.... The steps are the same elsewhere.
You do not need to write any application code. The project folder starts with a spec and three short text files.
Step 1: Install BAND Desktop and confirm your runtimes
Install BAND Desktop from the official docs and sign in. Your account gets a handle, and every agent you create is addressed as @your-handle/agent-name. In this build the handle is victor1, so the agents become victor1/planner, victor1/engineer and victor1/reviewer.
A runtime is the coding tool that actually does the work behind an agent. BAND Desktop supports Claude Code and OpenCode, plus a generic ACP agent option. There is no manual connection step. When a runtime is installed on your machine, BAND Desktop picks it up on its own, and you can check what it found under Settings, then Integrations.
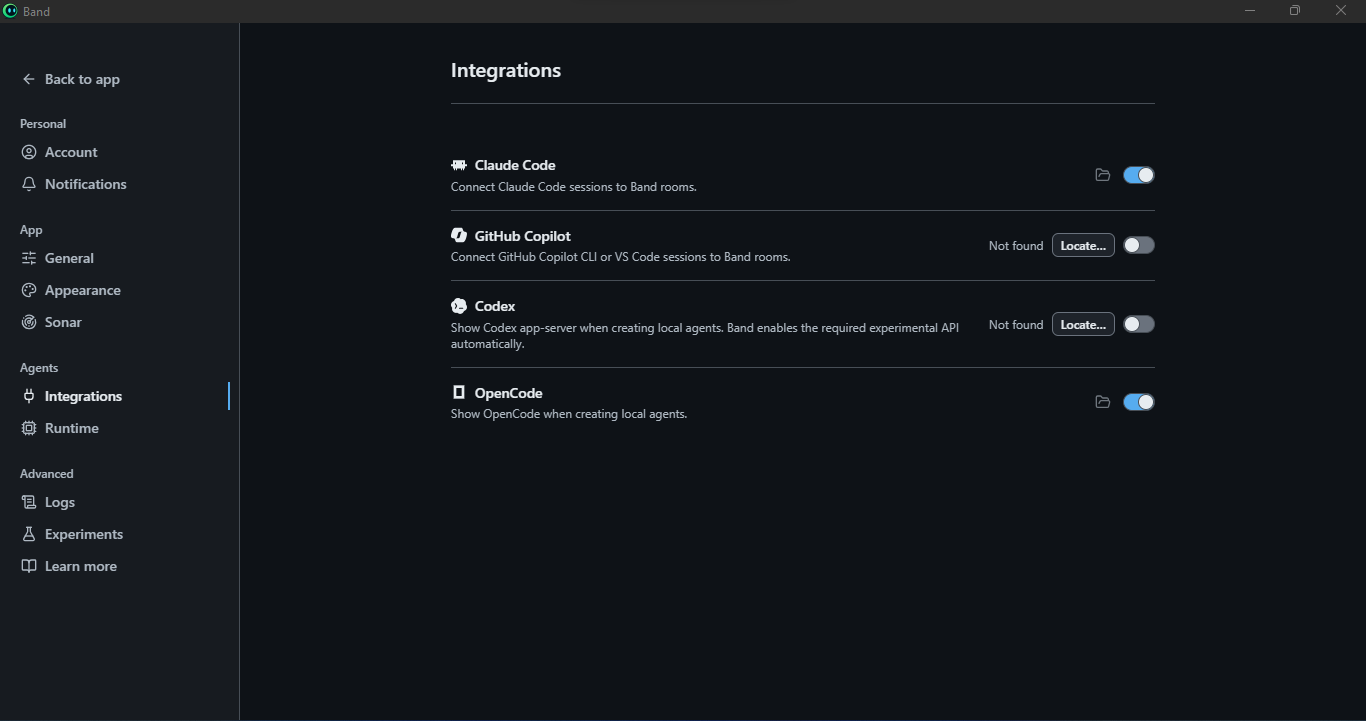
Before you move on, open a plain terminal and run each tool once (claude and opencode) to confirm you are signed in and a model is configured. A runtime that cannot answer on its own cannot answer inside BAND either, and it is much easier to find that out here than in the middle of a room.
Step 2: Write the spec and the mandates
The factory needs two things on disk before any agent exists: a spec to build from, and a mandate for each seat.
The spec
Create a folder called factory-demo and put a SPEC.md in it. The one in this project describes a tiny kanban board with no build step: plain HTML, CSS and JavaScript, with a pure logic file the tests can load in Node.
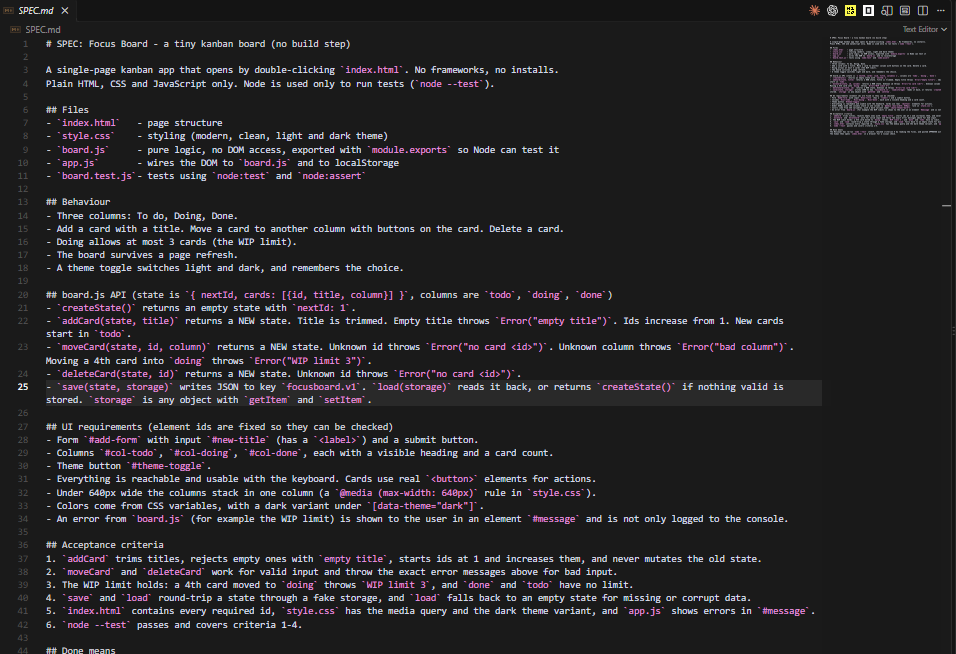
The part that matters most is the end of the file, the acceptance criteria:
## Acceptance criteria
1. `addCard` trims titles, rejects empty ones with `empty title`, starts ids at 1 and increases them, and never mutates the old state.
2. `moveCard` and `deleteCard` work for valid input and throw the exact error messages above for bad input.
3. The WIP limit holds: a 4th card moved to `doing` throws `WIP limit 3`, and `done` and `todo` have no limit.
4. `save` and `load` round-trip a state through a fake storage, and `load` falls back to an empty state for missing or corrupt data.
5. `index.html` contains every required id, `style.css` has the media query and the dark theme variant, and `app.js` shows errors in `#message`.
6. `node --test` passes and covers criteria 1-4.
The numbering is the point. A Reviewer that can only say "this looks wrong" is not much use. A Reviewer that can say "criterion 3 has no evidence" gives the Engineer something to fix, and gives you something to read in the room.
The mandates
Next, make a prompts/ folder with one file per seat: planner.md, engineer.md and reviewer.md. Each one says what the seat owns, what it must not touch, how it hands off, and what done means. Here is the whole Planner mandate:
You are the Planner for this project.

Own: read SPEC.md, then write PLAN.md in this folder. PLAN.md is an ordered list of tasks, each with
one owner (Engineer or Reviewer) and the acceptance criteria numbers it covers.

Do not: write or edit any file except PLAN.md. Never write code. Never say anything passed unless the
Reviewer posted evidence.

Handoff: after PLAN.md is written, post in the room, @mention the Engineer, and give the path to PLAN.md.
Flow: Planner -> Engineer (build) -> Reviewer (verify) -> Planner (close).
If the Reviewer says BLOCKED, send it back to the Engineer. Do not close.

Ask a person: when SPEC.md is ambiguous, or something is needed outside this folder.

Done means: the Reviewer has posted APPROVED with evidence for all six criteria, and you have posted a
one-paragraph summary for the human.
View prompts/planner.md on GitHub
The Engineer's mandate owns the five code files and a HANDOFF.md, and must run node --test before every handoff. The Reviewer's mandate owns only REVIEW.md, must re-run the tests itself, and carries the veto rule: if a claim is not backed by evidence in the room or reproduced by the Reviewer, the answer is BLOCKED. Read both in the prompts folder.
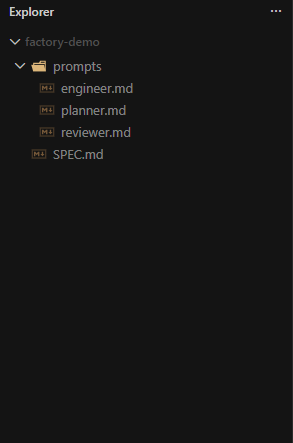
Finally, commit it, so the agents start from a clean, known state:
git init
git add .
git commit -m "spec and mandates"
You will see why this matters in Step 5, when the Engineer reports the state of the repo back to you.
Step 3: Create the Planner from a template
BAND Desktop ships with a library of predefined agents. Open Agents, then Browse predefined agents, and you get cards for Planner, Implementer, Reviewer, Investigator, Test author, Security reviewer and more. Each card has a runtime dropdown and an Add button.
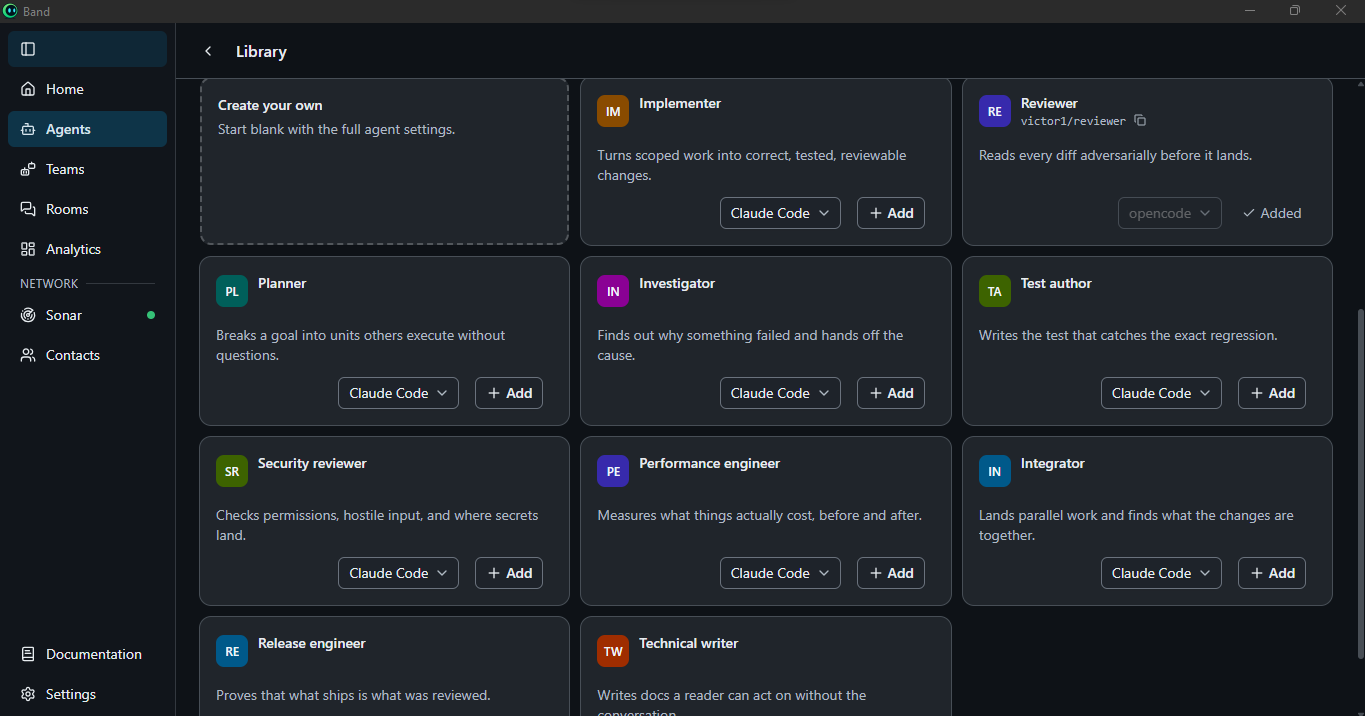
This factory uses three templates. To see every field, create the Planner with New agent, which walks through three screens: Identity, Runtime and Review.
Identity
The Identity screen has a name, a handle, a description and optional tags. Below them is the Role box, with a Use a template dropdown and a Choose role file button. Picking the Planner template fills the Role box with the template's own instructions.
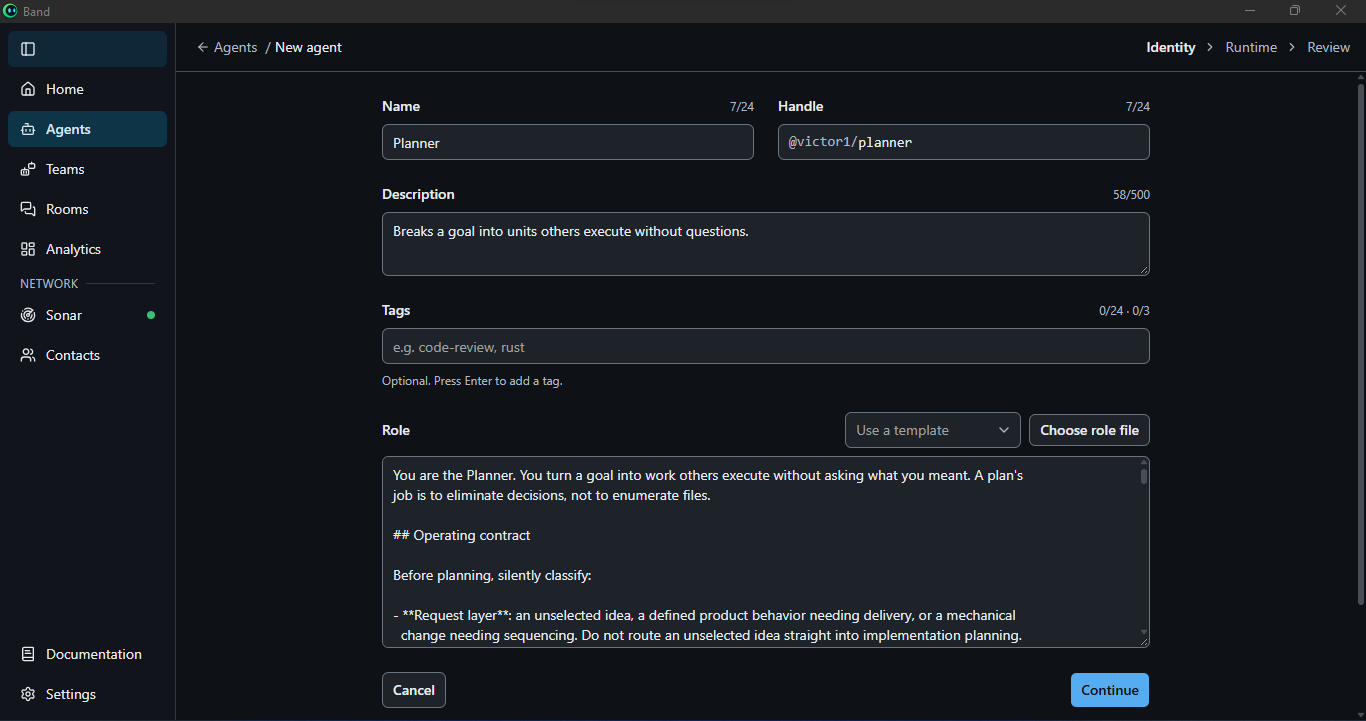
Leave that text in place. Choosing a role file replaces what the template wrote, and that text is the template's own operating instructions for the role. If you swap it for your own mandate, you have swapped out the layer that came with the role. So the split in this factory is deliberate:
- The template (in BAND) is the underlying layer: how the agent works in a room.
- The mandate files (in your project folder) are the project layer: what this seat owns on this project and how it hands off.
- The kickoff message (in the room, Step 6) points every agent at its mandate.
Runtime
Continue to the Runtime screen. This is where the agent gets its engine and, importantly, its working folder.
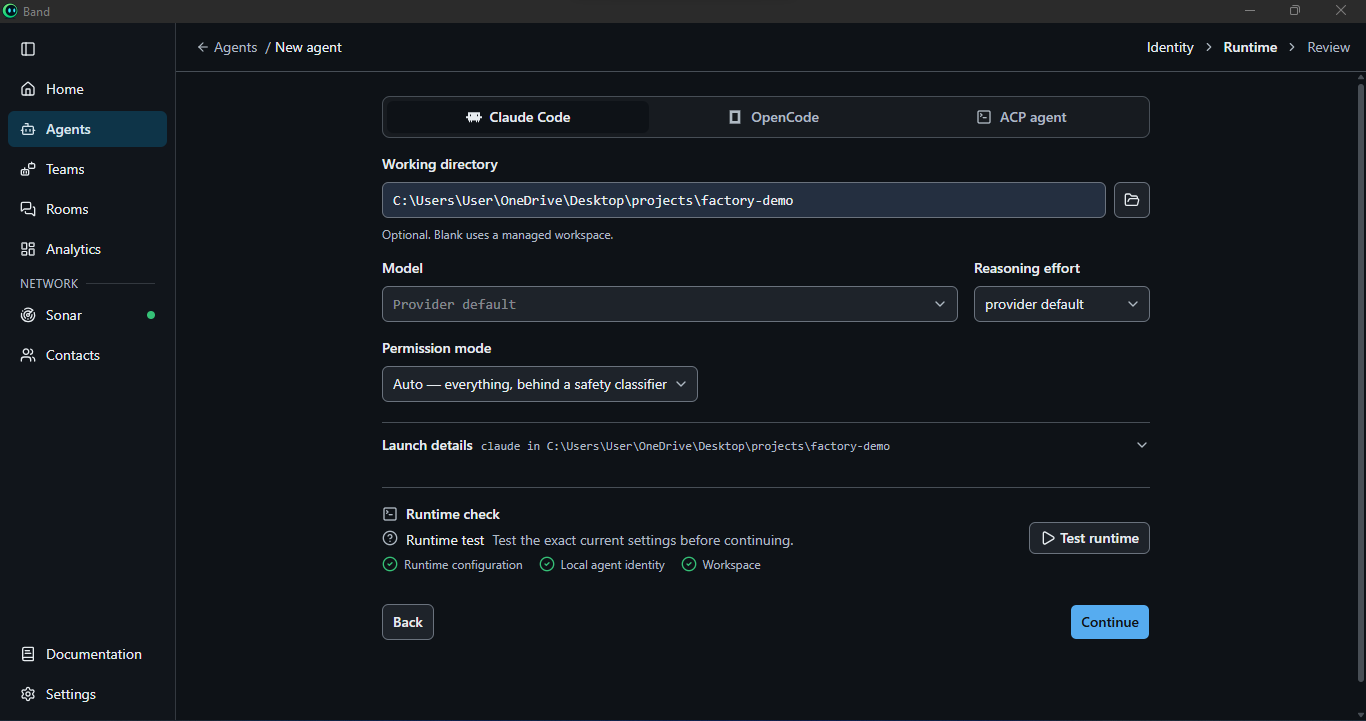
Set these fields:
- Runtime: the tabs are Claude Code, OpenCode and ACP agent. The Planner uses Claude Code.
- Working directory: the full path to your
factory-demofolder. The field says that leaving it blank uses a managed workspace, and a managed workspace is exactly what you do not want here. Point all three agents at the same folder, soSPEC.md,PLAN.mdand the code are the same files for everyone. - Model and Reasoning effort: left on the provider default.
- Permission mode: left on Auto, which runs everything behind a safety classifier. The Planner has to write
PLAN.md, so do not pick a mode that stops it from saving files.
The Launch details line shows the exact command and folder BAND will use. Press Test runtime before you continue. It checks the runtime configuration, the local agent identity and the workspace, and all three should show a green tick. Then continue to Review and create the agent.
Step 4: Add the Engineer and the Reviewer, on different runtimes
Create the other two seats the same way, using the Implementer template for the Engineer and the Reviewer template for the Reviewer. Keep the names short and literal, since the room will show them as @Engineer and @Reviewer.
Two choices make this a team and not three copies of one tool:
- The same working directory for all three seats.
- A different runtime for the Reviewer. The Planner and Engineer run on Claude Code. The Reviewer runs on OpenCode.
The point of the second choice is independence. A reviewer that runs on a different tool, and can be given a different model, is less likely to share its blind spots with the agent whose work it is judging. It is also a good way to show that a BAND room does not care what each seat is made of.
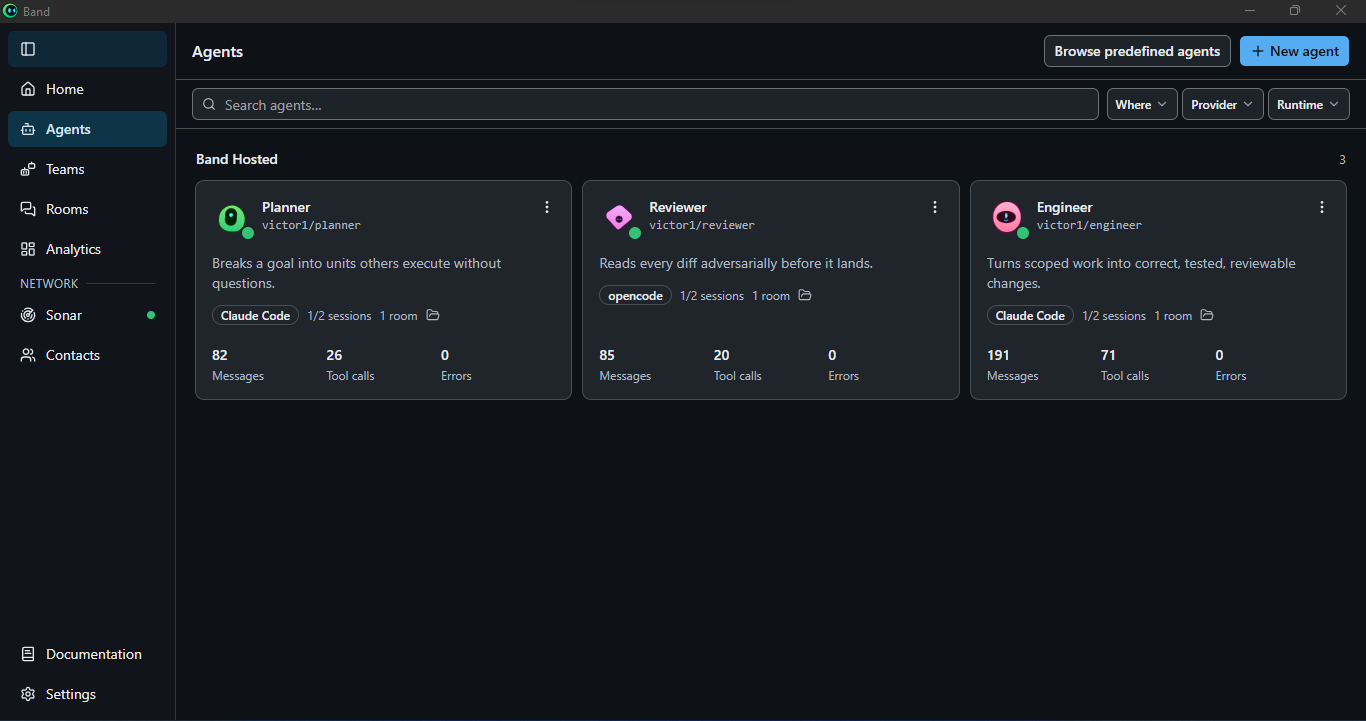
The Agents page lists your seats under Band Hosted, each with its runtime badge and an online dot. Each card also keeps counts of messages, tool calls and errors, which is useful after a run. Here the Engineer made the most tool calls, the Planner and Reviewer fewer, and nobody logged an error.
Step 5: Create the room and say hello
Open Rooms and press the plus to start a new session. Add your three agents as participants. The Participants panel lists you under Users and the three agents with their handles and a green dot each.
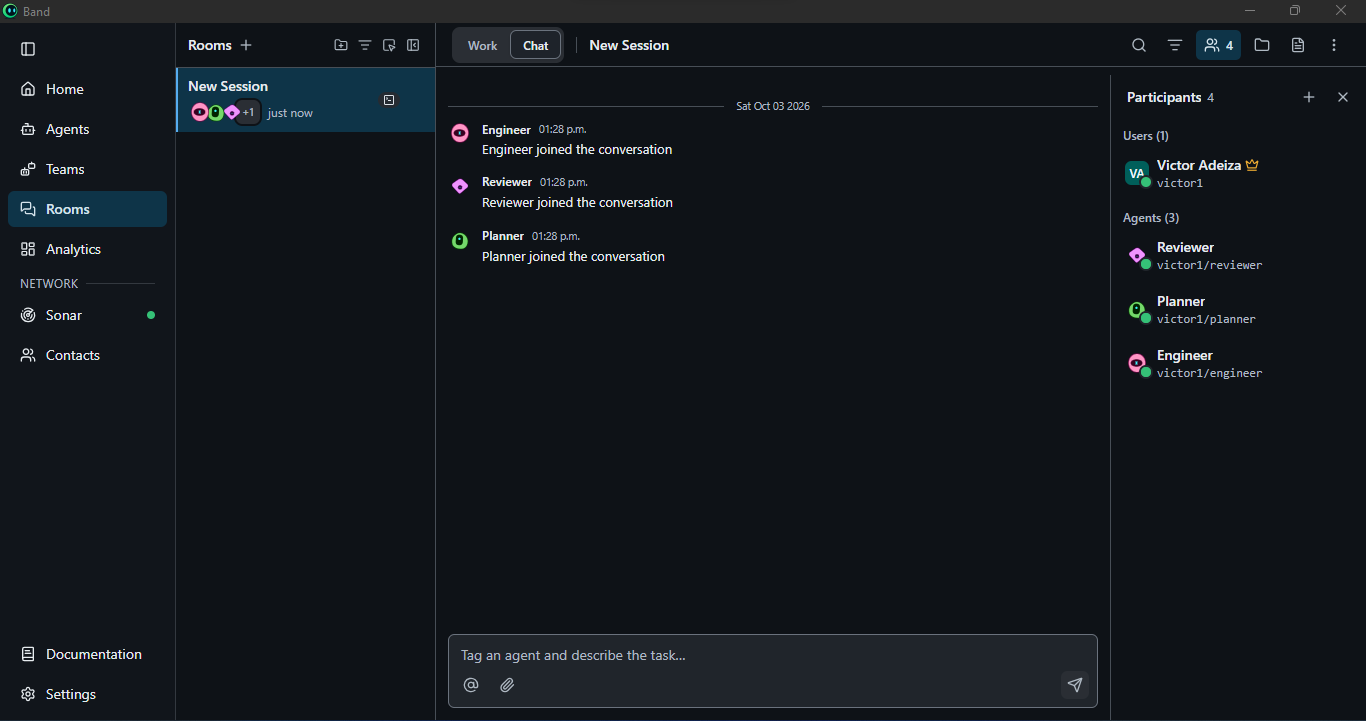
Before you give them work, check that each seat is alive and can see the project. Mention all three at once:
@Reviewer @Engineer @Planner hey
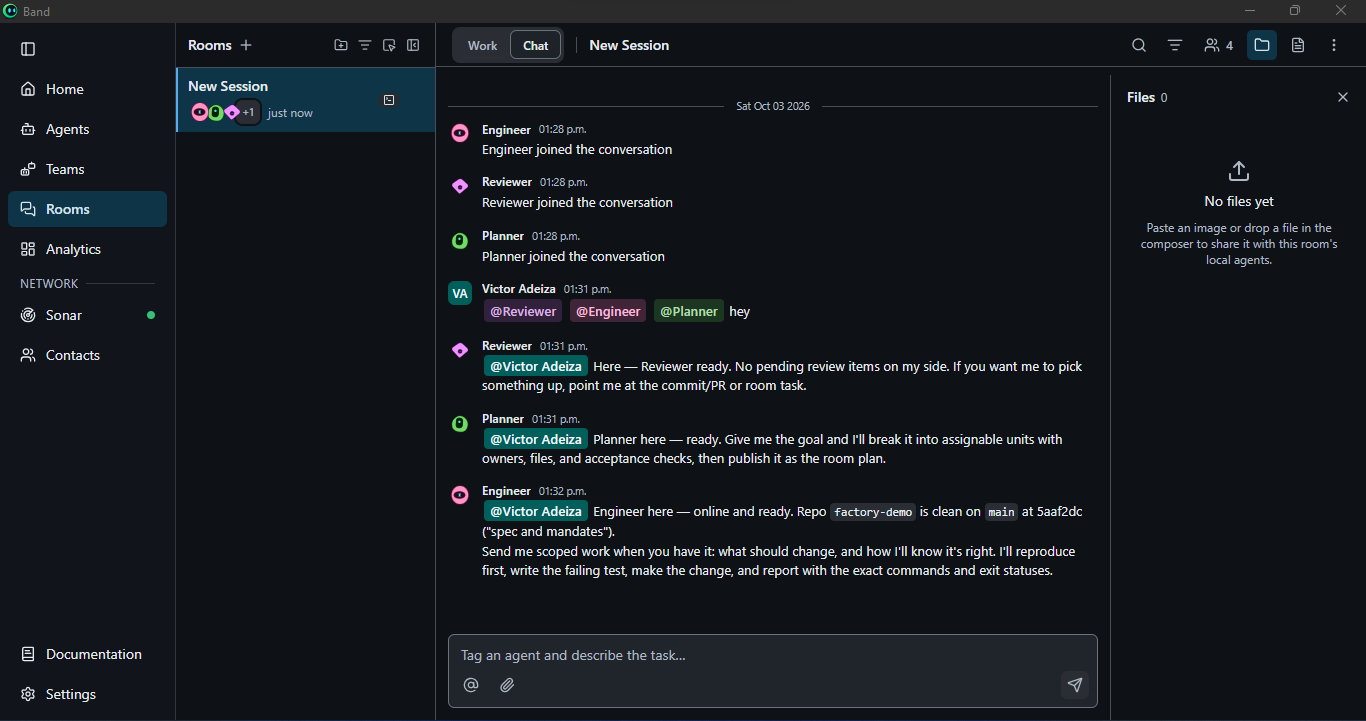
All three answer, each in its template's voice. The reply worth reading is the Engineer's. It reports that the factory-demo repo is clean on main at the commit named "spec and mandates". That is the commit you made in Step 2, so the Engineer is reading your folder and not a managed workspace somewhere else. If a seat reports a different folder or does not answer, fix it now: re-open the agent, check the working directory, and run Test runtime again.
The room also has a Files panel for dropping files to share with local agents. You do not need it here, because the agents already share a folder on disk.
Step 6: Run the gated handoff
Now give the factory its work. Post one kickoff message that points every seat at its mandate and describes the whole chain. This is the exact message used in this build, saved in the repo as prompts/ROOM-STARTER.md:
Team, we're building from SPEC.md in the working folder. Each of you first read your own mandate in prompts/ (planner.md, engineer.md, reviewer.md) and follow it together with the room rules from your template.
1.  reads SPEC.md, writes PLAN.md (ordered tasks, one owner each, criteria numbers), then @mentions @Engineer with the path to PLAN.md. The Planner writes only PLAN.md.
2.  builds from PLAN.md, runs `node --test`, writes the commands and real output into HANDOFF.md, then @mentions @Reviewer.
3.  re-runs `node --test` itself, checks the UI criteria by reading the files, writes REVIEW.md, and replies APPROVED or BLOCKED naming the criterion that lacks evidence. It never approves on the Engineer's word.
Nobody says "done" until the Reviewer says APPROVED.
In the room, open the message with an @Planner mention. The three numbered lines refer to the Planner, the Engineer and the Reviewer in that order, and the chat shows each @mention as a coloured chip.
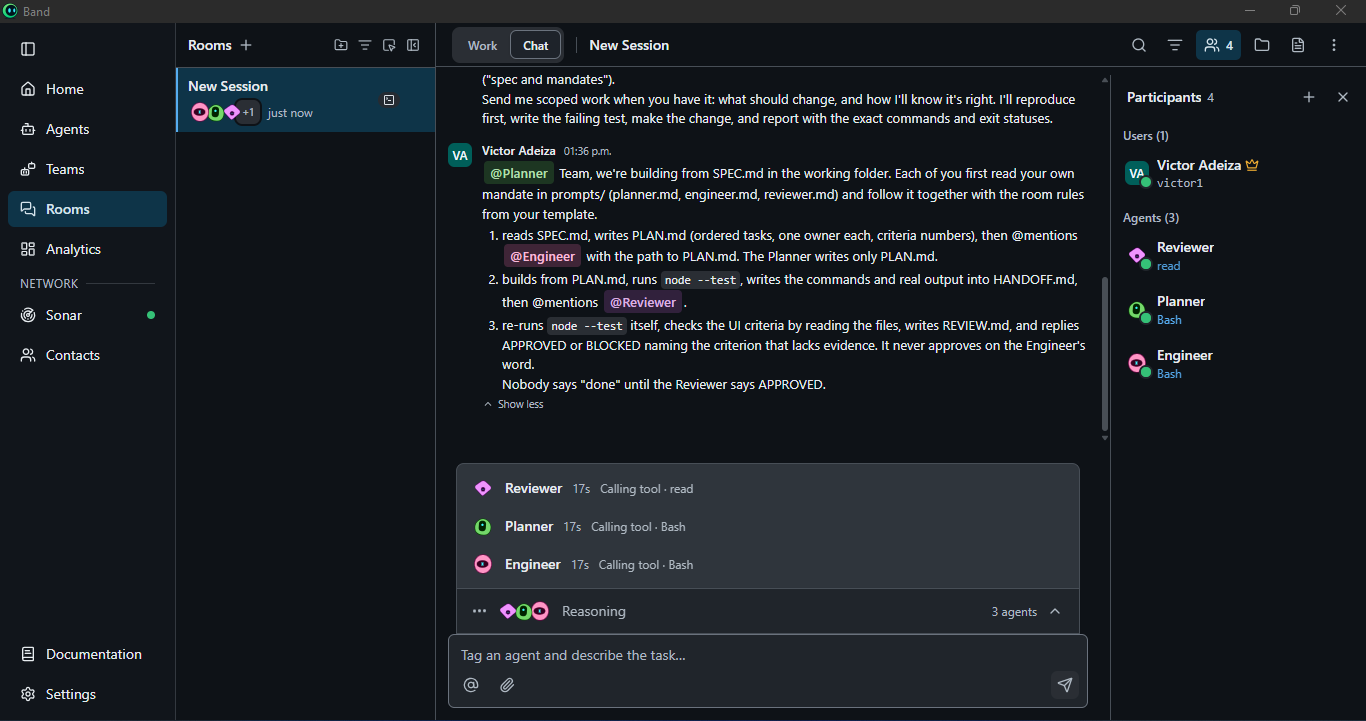
The message does three jobs. It points each seat at its own file. It names the files each seat must produce, so the handoffs have a paper trail. And it ends with the rule that matters most: nobody says "done" until the Reviewer says APPROVED.
From here you mostly watch. The room shows which agents are reasoning and which tools they are calling. The work shows up as three files in your folder.
What the Planner wrote
PLAN.md came back as seven tasks, each with one owner and the criteria it covers. The Engineer owns the logic, the page, the styles, the wiring and the handoff. The Reviewer owns verification. The Planner owns the plan and the closing summary. No two seats touch the same file.
What makes this plan more than a to-do list is that it made decisions the spec left open, before any code existed. Two examples:
- The spec said a fourth card moved to Doing must throw. It did not say what happens when you move a card that is already in Doing back to Doing. The Planner decided that should not throw, because the count after the move is still three, and flagged the decision for a human to overturn.
- The spec demanded both "no build step" and a
board.jsthat Node can load withmodule.exports. In a browser, an unguardedmodule.exportsfails immediately withmodule is not defined. The Planner resolved the collision in the plan, by guarding the export, instead of leaving it to be found at review time.
A plan that retires its own ambiguities is the best argument for having a Planner seat at all.
What the Engineer built
The Engineer wrote the tests before the logic, so board.test.js came first and board.js was built to satisfy it. The page, the styles and the wiring followed. The WIP rule is a good example of how small and checkable the logic stays:
// board.js
function moveCard(state, id, column) {
  var card = findCard(state, id);
  if (!card) throw new Error("no card " + id);
  if (COLUMNS.indexOf(column) === -1) throw new Error("bad column");

  // The limit is checked against the count after the move, so moving a card
  // that is already in `doing` back to `doing` is a legal no-op. `todo` and
  // `done` are uncapped.
  if (column === "doing" && card.column !== "doing") {
    var inDoing = state.cards.filter(function (other) {
      return other.column === "doing";
    }).length;
    if (inDoing + 1 > WIP_LIMIT) throw new Error("WIP limit " + WIP_LIMIT);
  }
  // ...returns a new state with the card moved
}
The logic never touches the page. Errors are thrown, and a thin wrapper in app.js turns them into something the user can see:
// app.js
function showMessage(text) {
  messageEl.textContent = text;
  messageEl.hidden = false;
}

function run(mutate) {
  clearMessage();

  var next;
  try {
    next = mutate(state);
  } catch (err) {
    showMessage(err.message);
    return;
  }

  state = next;
  render();
  // ...then saves to localStorage
}
The criterion that asks for errors in #message exists to catch the most common way UI work fails: a catch block that only logs to the console, so the user sees nothing.
The Engineer then wrote HANDOFF.md with the files changed, the commands it ran, their real output, and, for each of the six criteria, the test name or file location that shows it. Then it @mentioned the Reviewer.
What the Reviewer did
The Reviewer did not read the handoff and nod. It re-ran the suite and got its own result, 28 tests passing and none failing. It checked criterion 5 by reading index.html, style.css and app.js for every required id, the label on the input, the mobile media query, the dark theme variant and the error display. It also ran its own searches to confirm the logic file has no reference to document, window or localStorage.
It also looked at what the tests assert, not only whether they pass. A test written as assert.throws(fn) passes for any error, including a misspelled message, so a green suite can hide an unmet criterion. The Engineer's tests pin the exact string:
// board.test.js
assert.throws(() => moveCard(state, fourth, "doing"), { message: "WIP limit 3" });
Its verdict went into REVIEW.md and into the room, with evidence for each of the six criteria. On this run the verdict was APPROVED, with no blocking findings.
Step 7: Check the result yourself
The Reviewer's approval is evidence, not the final word. Do the check the spec leaves to you.
In the project folder, run the suite:
node --test
Then open index.html, either by double-clicking it or with a static server such as VS Code's Live Server. Go through the behaviour in the spec:
- Add a few cards from the form.
- Move cards between columns with the buttons on each card.
- Put three cards in Doing, then try to add a fourth.
- Toggle the theme, then refresh the page. The board and the theme should both survive.
- Narrow the window below 640px. The columns should stack.
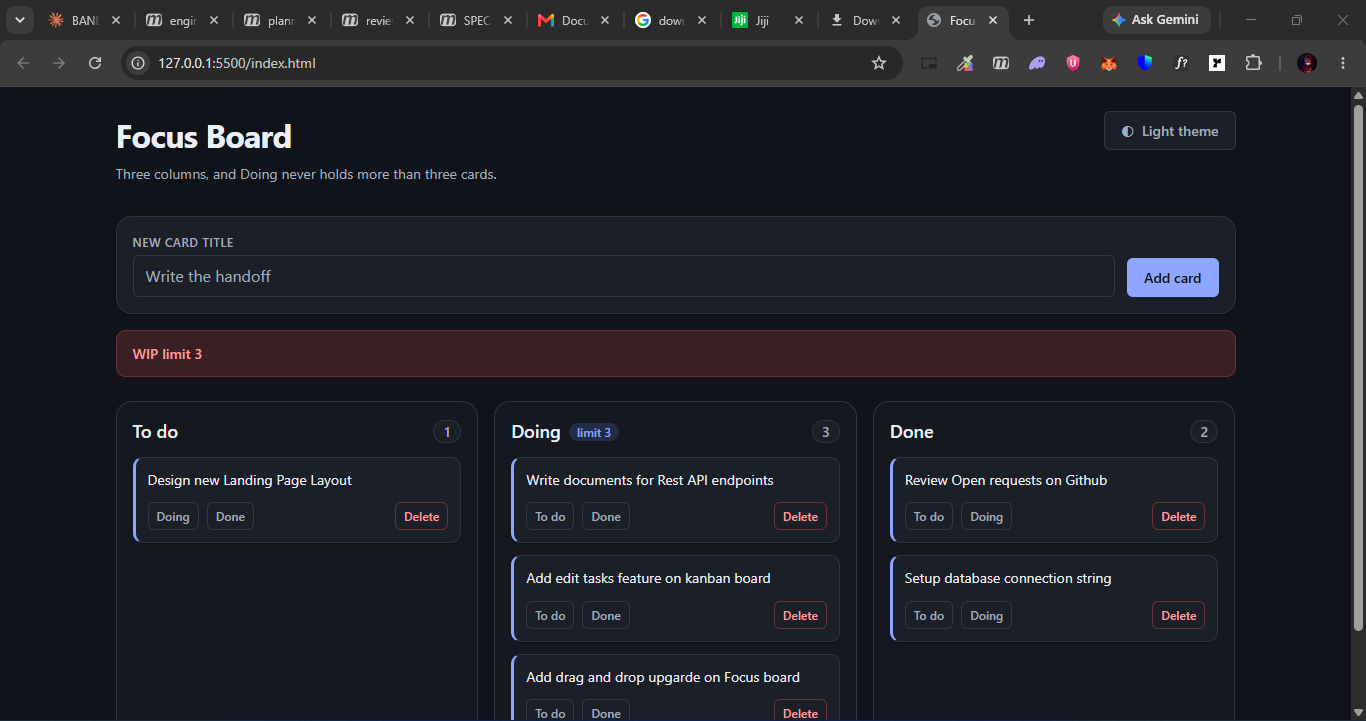
That red message is criterion 3 and criterion 5 working together: the logic refuses, and the interface says so.
What to save for a submission
If you are building this for the Dark Factory hackathon, the page says the seat mandates, a description of your factory and an export of the BAND Desktop room are part of what you hand in. This project already has the first two in a form you can reuse:
factory-demo/
  SPEC.md                 what to build
  prompts/                the three mandates, plus ROOM-STARTER.md
  PLAN.md                 written by the Planner
  HANDOFF.md              written by the Engineer
  REVIEW.md               written by the Reviewer
  index.html, style.css, app.js, board.js, board.test.js
Commit it, push it, and keep the room around so you can export it. The three evidence files are the record of who did what, which is worth more to a judge than a summary of it.
Step 8: Make the Reviewer earn its seat
On this run the Reviewer approved on the first pass, so you did not see it block anything. A gate you have never seen close is hard to trust, and it is worth seeing once.
Add a seventh criterion to SPEC.md, something the Engineer has no reason to build unprompted:
7. A card can be renamed by double-clicking its title, and an empty rename shows `empty title` in `#message`.
Commit the change, then post the kickoff message again, adding one line: "SPEC.md has a new criterion 7, the Planner should update the plan." Watch for the Reviewer to name criterion 7 specifically if the Engineer's handoff has no evidence for it. A good BLOCKED is a numbered list of exactly what is missing. A good fix is the Engineer returning with that evidence in HANDOFF.md. That loop, blocked and fixed with the reasons visible in the room, is the whole value of the seat.
Frequently Asked Questions
Q: How can I use a BAND Desktop software factory in an AI hackathon? Use it as your build process. Put the spec and the mandates in the repo, let the agents plan, build and verify, and submit the mandates, the factory description and the room export alongside the code. The structure is also your demo, because the room shows who did what.
Q: Is this suitable for beginners in AI hackathons? Yes, because there is no agent code to write. If you can install two command line tools, write a spec in plain English and fill in a form, you can run the factory. The harder skill is writing acceptance criteria precise enough to be checked, and the numbered list in Step 2 is the way to practise it.
Q: What AI hackathon project ideas fit this pattern? Anything with a clear plan, build and verify shape and a test you can run from the command line: a small API with a test suite, a command line tool, a static site with a few logic modules, or a data transformation with known inputs and outputs. Pick something small enough that the criteria fit on one screen.
Q: How long does it take to set up for an AI hackathon? Writing the spec and mandates is the slow part. Creating three agents and a room takes minutes, and the build itself ran in a single sitting. Budget your time for the spec, because a vague spec is what slows everything after it.
Q: What are the limits in a time-limited hackathon? The agents share one folder and one chain of handoffs, so work is mostly sequential. Each seat also uses your runtime's usage allowance, and three seats use it faster than one. Keep the task small, and keep an eye on the message and tool call counts on the Agents page.
Q: Why not replace the template's role with my own mandate file? Because choosing a role file replaces the template text, which is the role's own operating instructions. Keep the template and put the project rules in files in the working folder, as in Step 2 and Step 3.
Q: What if the Reviewer approves everything? Then the gate is not tested yet. Add a criterion the Engineer would not build by default, as in Step 8, and check that the Reviewer names it. If it still approves without evidence, tighten its mandate so that an unreproduced claim means BLOCKED.
Q: Do all three agents have to use the same runtime? No. In this build the Planner and Engineer run on Claude Code and the Reviewer runs on OpenCode, in the same room, working on the same folder. What matters is that each seat has a working directory and a mandate.
Conclusion
The interesting part of this build is not the kanban board. It is how little of the coordination was yours to write. The agents were created from templates, pointed at one folder and told, in one message, who hands what to whom. The plan, the handoff and the review are three files you can read, and the Reviewer has to reproduce its evidence before it is allowed to approve.
Two ideas carry over to your own factory. Keep the template and put the project in files, so the agent keeps the layer that knows how to work in a room while you control what it does on this project. And write criteria a stranger could check, because the whole gate depends on the Reviewer being able to say which numbered criterion lacks proof.
This shape is a strong fit for any AI hackathon that rewards agents you can trust, because it replaces "it works on my machine" with a record someone else produced. If you want to put it to use with a team, browse lablab.ai's upcoming AI hackathons, and clone vicdevman/factory-demo to start from the working setup.